Making the switch to lithium (LiFePO4) batteries represents one of the most significant upgrades you can make to your RV’s power system. Whether you’re planning to upgrade your existing RV’s power system or looking at a new vehicle equipped with lithium batteries, understanding how lithium battery setups differ from traditional AGM (Absorbed Glass Mat) systems is crucial for maximising your investment and ensuring safe operation.
Greater Depth of Discharge (DoD): Lithium batteries can safely use up to 80% of their rated capacity, compared to just 50% for traditional AGM batteries. This means a 100Ah lithium battery delivers similar usable power to a 160Ah AGM battery
Superior, More Stable Performance: Lithium batteries maintain a consistent 13V+ output throughout their discharge cycle, while AGM batteries experience a gradual voltage drop from around 12.8V to 12.1V. The higher continuous discharge rates that lithium batteries maintain make them ideal for running power-hungry appliances like coffee machines and air conditioners without breaking a sweat.
Weight Savings: Due to their higher energy density, lithium batteries are up to 60% lighter and 30% smaller than equivalent AGM batteries with the same usable power. This weight reduction frees up valuable payload capacity for other gear.
Faster Charging: Lithium batteries can accept much higher charge currents and typically charge 3-4 times faster than equivalent AGM batteries. A 100Ah lithium battery can fully charge in 3-4 hours, compared to 10+ hours for AGM.
Longevity: Quality lithium batteries typically last 8-10 years or 3,000-5,000 charge cycles when properly maintained, compared to 3-5 years for AGM batteries. While the upfront cost is higher, the cost per amp-hour over the battery’s life is actually lower than AGM—making Lithium a smart long-term investment.
Lower Self-Discharge Rate: Lithium batteries typically lose around 3% of charge per month, compared to 5-15% for AGM batteries. This dramatically reduces the risk of battery damage when your van is parked for extended periods between adventures.
Pro Tip: Always seek professional advice when selecting electrical hardware to ensure your system is compatible and meets your specific power demands. Crucially, verify that all components are designed for mobile applications; hardware intended for stationary home use often cannot withstand the constant vibration and thermal stresses of caravan travel.
Most importantly, confirming the lithium battery you’re considering is IEC 62619 certified is essential. This international standard subjects batteries to rigorous testing, ensuring they’re safe and reliable. Certified batteries feature an integrated Battery Management System (BMS) that provides critical protections, including over/under-voltage, over-current, and temperature monitoring.
Beyond safety and certification, the most critical decision you’ll make is “right-sizing” your system. Because lithium batteries represent a significant financial investment and consume both physical space and valuable payload, selecting the correct Amp-hour (Ah) capacity for your specific needs is vital.
To determine your ideal capacity, consider how the following factors intersect:
By balancing your appliance demands with your typical travel habits, you can specify a system that provides the ultimate freedom of off-grid travel without over-investing in capacity you’ll never use.
Lithium batteries require specific charging profiles and must be used with chargers featuring lithium-specific modes. Using the wrong charger or mode can have serious consequences beyond just damaging the battery.
Chargers must be sized with consideration to the nominal and peak charging rates specified by the battery manufacturer. The charger amperage output must never exceed the battery’s peak charge rate, and to prolong battery life, should ideally match the nominal charging rate.
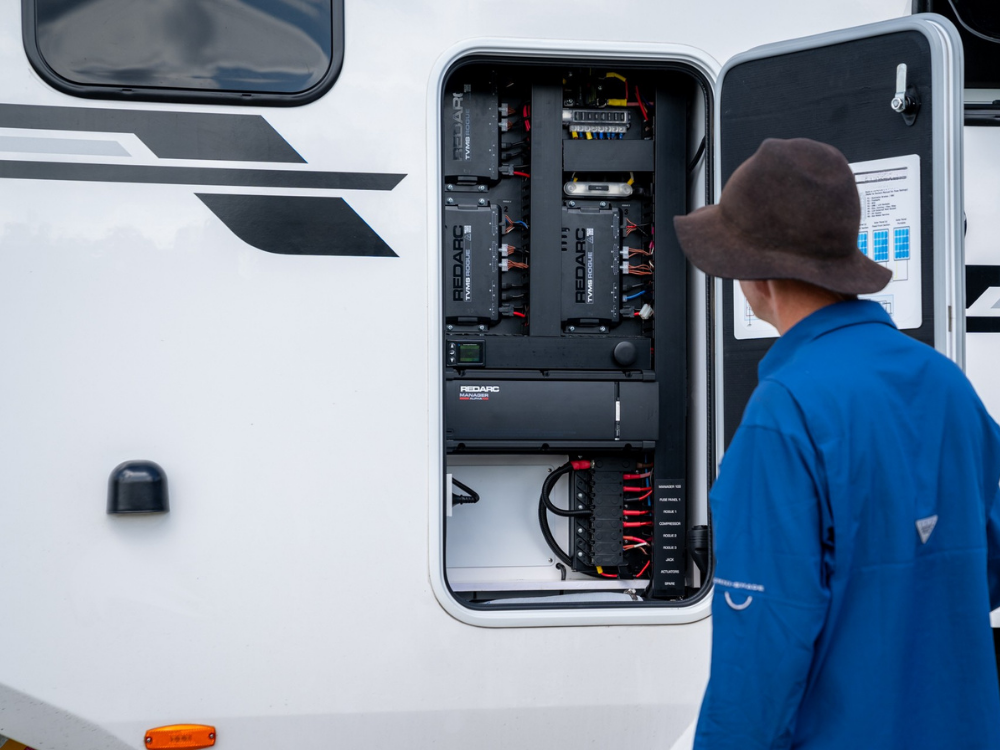
A typical RV charging system contains two types of chargers, which may be integrated into one unit, or as separate components depending on the manufacturer:
AC-DC Charger: Converts 240V mains power (when you’re plugged in at the caravan park) into DC power suitable for charging the lithium batteries.
DC-DC Charger: Utilises DC power from your tow vehicle’s alternator or solar panels (if fitted) and converts it to stable voltage and current for charging the battery in your RV. Modern vehicles have “smart alternators” that vary their output voltage for fuel efficiency, making a DC-DC charger essential rather than optional. If your setup includes solar panels, look for a charger featuring a Maximum Power Point Tracking (MPPT) solar regulator that maximises power harvested from solar panels.
An inverter converts 12V DC from the batteries to 240V AC suitable for powering household appliances. Select a pure sine wave inverter for smooth and stable power, as basic, modified sine wave inverters can damage sensitive electronics and cause annoying interference with devices.
Look for models equipped with an automatic transfer switch (ATS) that seamlessly detects when the van is plugged into 240V power at caravan parks and switches over automatically, making camp setup effortless.
Critical Sizing Consideration: Inverters must be matched to both your power demands and your battery’s capabilities.
Doing the Math: Inverter output is typically measured in Watts (e.g., 2000W or 3000W). To size your system, check the “Continuous Power” label on your devices and add up everything you intend to use at once.
For example: If your essential base loads draw 200W and you turn on an 1800W coffee machine, a 2000W inverter is already at its limit. Attempting to use a 900W toaster at the same time will cause an immediate shutdown. In this instance, a 3000W inverter provides the necessary headroom to run these appliances simultaneously.
Pro Tip: W vs. VA – Know the Difference & Check your labels carefully. An inverter rated at 3000W generally supports 3000 watts of actual load. However, if it is labelled “3000VA”, the real-world capacity may be significantly lower—often around 2400W for complex, inductive loads like air conditioners. Always check the specifications for the “Continuous Power” rating in Watts to ensure the system meets your expectations.

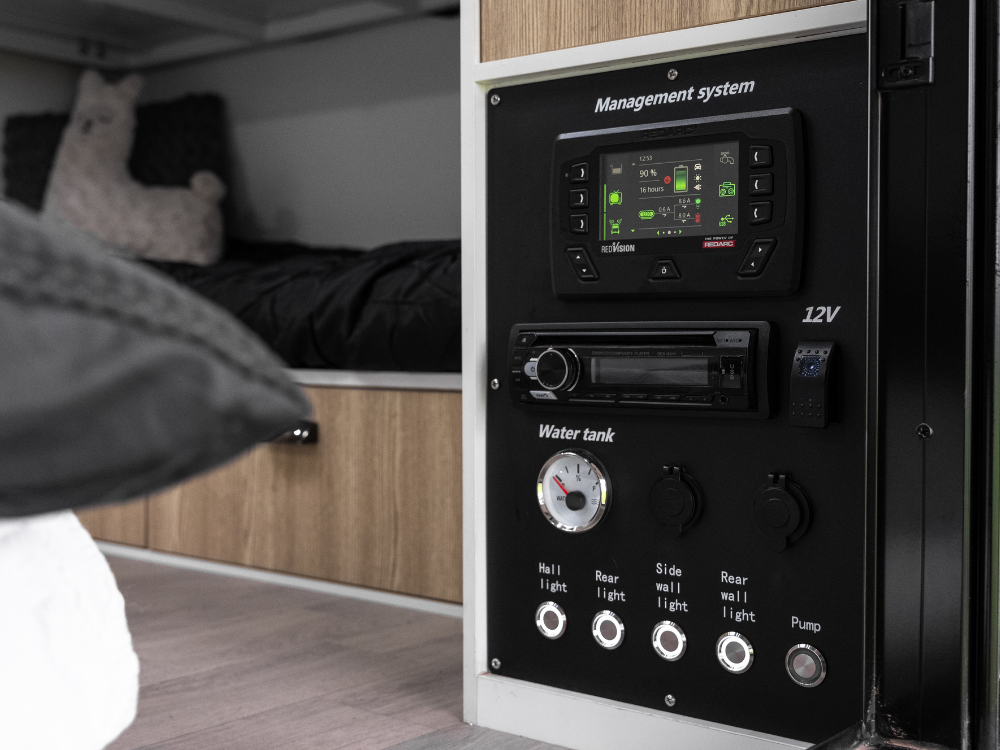
Unlike lead-acid batteries where voltage indicates state of charge, lithium batteries maintain consistent voltage until nearly depleted, making voltage alone an unreliable indicator. A quality battery monitor using a shunt to measure current flow provides precise tracking of battery state of charge (SOC%), showing you exactly how much usable power remains.
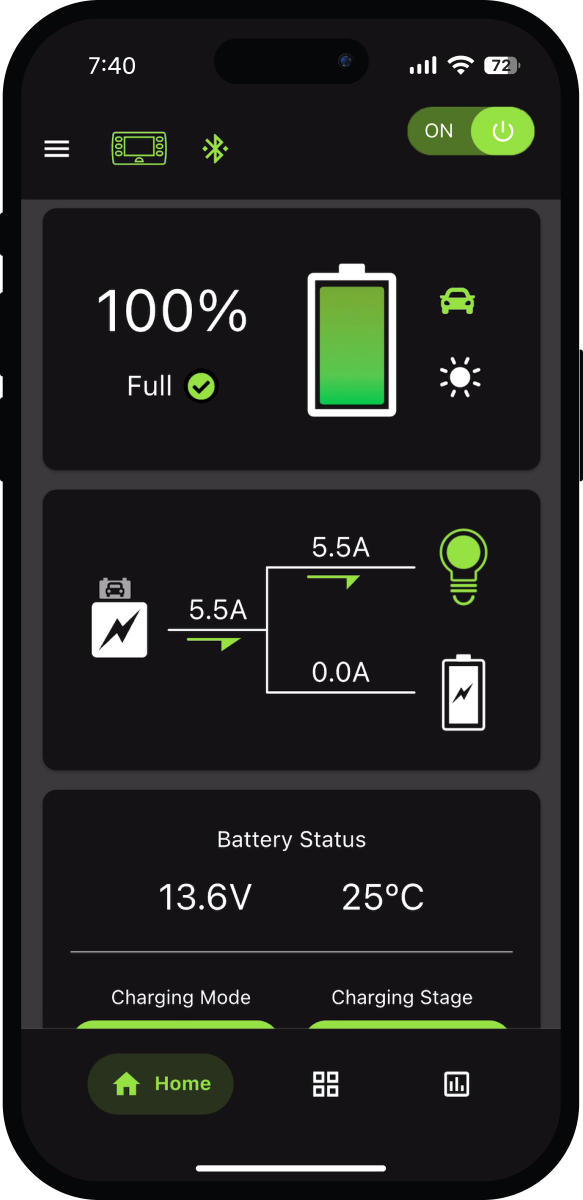
All lithium battery setups are required to be monitored and display the state of charge. More sophisticated setups include Bluetooth monitoring, allowing you to check voltage, current, temperature, and SOC from your smartphone via a dedicated app.
This gives you real-time visibility of your power system at your fingertips, helping you manage consumption and avoid unexpected power depletion.
Australian Standard AS/NZS 3001.2:2022 mandates specific installation requirements for lithium battery setups in RVs. This standard applies to both newly built vehicles as well as older RVs upgrading to lithium battery setups and must be followed to ensure safe operation of the power system.
Many reputable manufacturers will provide a signed statement or certificate confirming the electrical system has been designed and installed in accordance with AS/NZS 3001.2:2022. If this isn’t automatically provided, don’t hesitate to ask, it’s your assurance of a compliant, safe installation.
Warning: It may be tempting to DIY, but doing so can put not only the vehicle but also your family at risk.
While safe when done correctly, improper installation can be catastrophic, leading to:
Using a professional, qualified installer experienced in caravan electrical standards and lithium battery installations is strongly recommended. It is important they consider the system as a whole, so factor in ALL the accessories you plan to use.
It’s important to understand some basics of AS/NZS 3001.2:2022 so you can verify the RV you’re looking at meets the standard:
For Internal Installation:
If batteries are installed within the habitable area of the RV (including under a bed, in a cupboard, or under a seat), the battery must be:
For External Installation:
Batteries mounted on the chassis or outside the caravan must be:
Lithium batteries require minimal maintenance compared to AGM batteries, but following these practices ensures optimal performance and battery longevity:
Contact a professional if you notice:
These symptoms can indicate problems with your installation, charging system, or battery health and should be addressed immediately.
Lithium batteries feature a low self-discharge rate of approximately 3% per month, but due to their unique charging characteristics, they should not be float-charged like traditional AGM batteries. Following proper storage procedures is essential for maintaining lithium battery health during periods of non-use:
Temperature Considerations: Ideally, store your caravan in a location where temperatures remain between 18°C and 28°C. Ensure your battery compartment remains well-ventilated to prevent moisture buildup.
Charge to Optimal Level: Charge your lithium battery to approximately 80% state of charge before storage.
Note: Some battery management systems feature a storage mode when the caravan is not use for an extended period. If the Caravan is plugged into AC 240 or has access to solar when in storage mode, this will manage the battery level for you.
Complete Isolation: Disconnect the battery from all loads using your battery isolator switch. Even small parasitic drains from monitoring equipment or LED indicator lights can discharge the battery over extended periods.
Regular Monitoring: Check the battery charge level every three months during storage. If it drops below 40%, recharge the system to 80% before isolating it once again.
Critical Warning – BMS Safe Mode: If not monitored correctly during storage, the battery voltage can drop to the point where it can’t power its internal Battery Management System (BMS) and defaults to fail-safe mode, preventing further charging.
Always consult the battery manufacturer’s instructions for guidance before attempting to perform a reset. Extended periods in safe mode (more than 14 days) can cause irreversible battery damage.
Whether you’re upgrading an existing setup or specifying batteries for a new RV, professional advice and installation are essential. Prioritize high-quality, compliant components designed to withstand Australia’s unique conditions —from extreme heat and humidity to constant road vibration. Ongoing maintenance is the key to ensuring your system remains safe and reliable; after all, the last thing you want is a failure when you’re miles from help.
Modern lithium systems offer the ultimate freedom: the ability to explore Australia’s stunning landscapes off-grid without sacrificing the creature comforts of home. With the right setup and proper care, you’ll quickly wonder how you ever managed without it.

This guide provides general information about lithium battery setups for caravans. Always consult with qualified professionals for installation and ensure all work complies with current Australian standards and regulations. Individual battery manufacturers may have specific requirements for their products.
Key Industry Partners